How to Reheat Chicken Tenders Maintaining Crispness— 4 Easy Methods

Do you want to reheat those crispy and juicy chicken tenders from last night’s dinner?
I have some quick and easy methods to reheat chicken tenders and bring them back to life.
A Quick Note on My Reheating Chicken Tenders Experiment
Before we begin on how to reheat chicken tenders, I’d like to point out that I experimented with different reheating techniques, including the microwave, oven, skillet, and even a toaster oven.
- Reheating chicken tenders in the microwave: Quick and Convenient also doesn’t require any additional equipment but can result in uneven heating.
- Reheating chicken tenders in the oven: A bit time-consuming but makes it evenly heated and crispy.
- Reheating chicken tenders in a skillet: Time-consuming depending on the batch but the results are crispy and don’t dry out.
- Reheating chicken tenders in a toaster oven: This may take longer than the other methods, but it produces crispy results.
After trying out all these methods, I found that the best way to get them crispy and evenly heated is to reheat chicken tenders in a toaster oven or oven. These methods take longer than microwaving or using a skillet, but the results are worth the wait.
If you’re in a hurry or don’t have access to an oven, microwaving or cooking in a skillet are still viable choices.
Watch this video to get a visual understanding of how to reheat chicken tenders.
How to Reheat Chicken Tenders in the Microwave
This is the best way to quickly and simply reheat chicken tenders. I had hot and juicy chicken tenders with a microwave-safe dish and a damp paper towel in minutes.
- Place chicken tenders on a microwave-safe plate, ensuring not to overcrowd them.
- Cover the plate with a damp paper towel to prevent the chicken from drying.
- Microwave on high for 20-30 seconds per tender, checking them after each interval until they’re heated through.
Pros
Quick and convenient, doesn’t require any additional equipment or tools.
Cons
If not closely monitored, chicken tenders can become rubbery or irregularly heated.
How to Reheat Chicken Tenders in Oven
For those who prefer crispy and evenly heated chicken tenders, the oven or toaster oven method is the way to go. While it takes a bit longer to preheat and bake, the results are worth the wait.
- Preheat the oven or toaster oven to 375°F (190°C).
- Place the chicken tenders on a baking sheet lined with parchment paper or aluminum foil.
- Bake for 8-10 minutes, flipping halfway through, until the tenders are heated and crispy.
Pros
Produce the crispiest and most evenly heated chicken tenders, perfect for those who want restaurant-quality results.
Cons
Take longer than other methods and require preheating the oven.
How to Reheat Chicken Tenders in Skillet
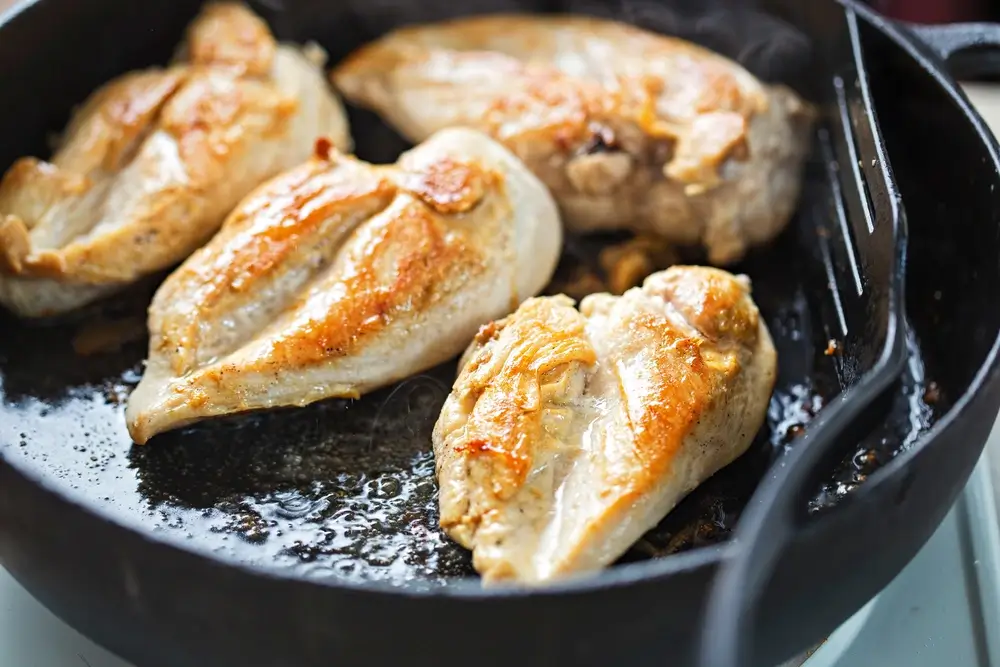
If you’re short on time and want to reheat your chicken tenders on the stovetop, the skillet method is a great option. With a bit of oil or butter and constant attention, I had hot and crispy chicken tenders in just a few minutes.
- Heat a nonstick skillet over medium-high heat.
- Add a bit of oil or butter to the skillet.
- Place the chicken tenders in the skillet and cook for 2-3 minutes per side, or until heated through and crispy.
Pros
Faster than using an oven, and can produce a crispy exterior if cooked with oil or butter.
Cons
Requires constant attention to prevent the chicken tenders from burning or drying out.
How to Reheat Chicken Tenders in Toaster Oven
If you don’t have access to an oven or skillet, it can be a great alternative to reheat chicken tenders in a toaster oven. The added benefit I faced is that it’s quicker and more energy-efficient than using a full-size oven.
- Preheat the toaster oven to 375°F (190°C).
- Line a baking sheet with parchment paper or aluminum foil and place the chicken pieces on it.
- Bake for 8-10 minutes, flipping midway through, or until the tenders are hot and crispy.
Pros
Quick and easy, energy-efficient, provides a crispy texture.
Cons
May not heat as evenly as the oven method, and there is limited space for larger batches.
How to Store Chicken Tenders
As someone who enjoys cooking in bulk, I know the importance of proper food storage. To store chicken tenders properly and keep them fresh, follow these tips
1. Use a Ziplock Bag
Place the chicken pieces in a ziplock bag or an airtight receptacle. Check for air inside the container or sack, as this can cause freezer burn and spoilage. Removing excess air will help the chicken tenders stay fresher for longer and avoid freezer burn, which can impact the tenders’ texture and flavor.
2. Label the Container or Bag
Label the container or bag with the date and the name of the meal so you know when and what it is. This will allow you to keep track of when you kept the chicken tenders and avoid eating them after their expiration date.
3. Refrigerate and Freeze Promptly
Refrigerate the chicken tenders for up to 3 days or store them for up to 3 months. If you’re storing them in the freezer, put the container or bag in the rear to shield them from temperature fluctuations. This will help to keep the temperature stable and avoid thawing and refreezing, which can lead to freezer burn.
4. Thaw Properly
Place frozen chicken pieces in the refrigerator overnight to thaw. If you are pressed for time, you can thaw them in the microwave on the defrost option. It is critical to correctly thaw chicken tenders to ensure even reheating and to prevent harmful bacteria from growing.
Related Post: How To Reheat A Sandwich In The Oven
How Long Do Chicken Tenders Last?
As someone who enjoys chicken tenders, I understand how essential it is to keep them fresh and safe to eat. In this part, I’ll discuss how long chicken tenders last in various storage conditions.
Room Temperature
Chicken tenders should not be left out at room temperature for more than 2 hours. Bacteria can multiply quickly at room temperature, resulting in food poisoning.
As a result, it is critical to refrigerate or freeze your chicken tenders as soon as feasible. To avoid the risk of foodborne disease, discard chicken tenders that have been sitting out at room temperature for more than 2 hours.
Refrigerator
When stored correctly in an airtight container or ziplock bag, chicken tenders can last up to 3 days in the refrigerator. Label the container or bag with the date and the name of the food to keep track.
When storing chicken tenders in the freezer, ensure they are securely sealed in an airtight container or ziplock bag to avoid freezer burn and maintain quality.
Freezer
If you aren’t going to consume your chicken tenders within three days, place them in the freezer. Chicken tenders can be kept in the freezer for up to 3 months. Keeping them in an airtight container or ziplock bag is critical to avoid freezer burn, which can cause the poultry to dry out and lose flavor.
Remember that chilling and thawing can change the texture of your chicken tenders. When you freeze chicken tenders, ice crystals develop, causing the meat to become slightly dry when thawed. To avoid this, give moisture to the chicken tenders before freezing them, such as by coating them in a light layer of oil or wrapping them in plastic wrap.
I like to consume my chicken tenders as soon as possible after cooking. You can, however, extend the shelf life of your chicken tenders and savor them for up to 3 months by following these storage guidelines.
Conclusion
That’s all there is to it, people! Whether you prefer the microwave or the oven, reheating your chicken tenders can be a breeze with my easy tips and techniques. Say farewell to soggy, rubbery tenders and welcome to perfectly heated, crispy perfection.
With these methods on how to reheat your chicken tenders in your cooking arsenal, you’ll never have to sacrifice flavor for convenience again. Happy reheating!